Exporting theme
With the theme fully ready, it’s time to export it to be used in RetroHub. This is pretty simple and your theme should behave almost exactly the same way afterwards.
Exporting
To export a theme, you’ll export it like it’s a regular Godot project. The difference is you’re not going to export a final executable; instead, you’ll export it in a PCK format, an “archive” which Godot can load at runtime.
Open the export dialog by going to Project > Export…

Select the Export Theme preset already available; the selected OS is indifferent as the exported project is cross-platform and will run on any OS.
Open the Resources tab and ensure the settings are set properly:
Export Mode: Export all resources in the project except resources checked below
Resources to exclude: Tick all addons which are already bundled in RetroHub to save space, as well as the
retrohub_theme_helperaddon, which is only used for development purposes.Filter to export non-resource files/folders: Add
theme.json. This is the file read by RetroHub with information about your theme (all the info from the RetroHub tab)
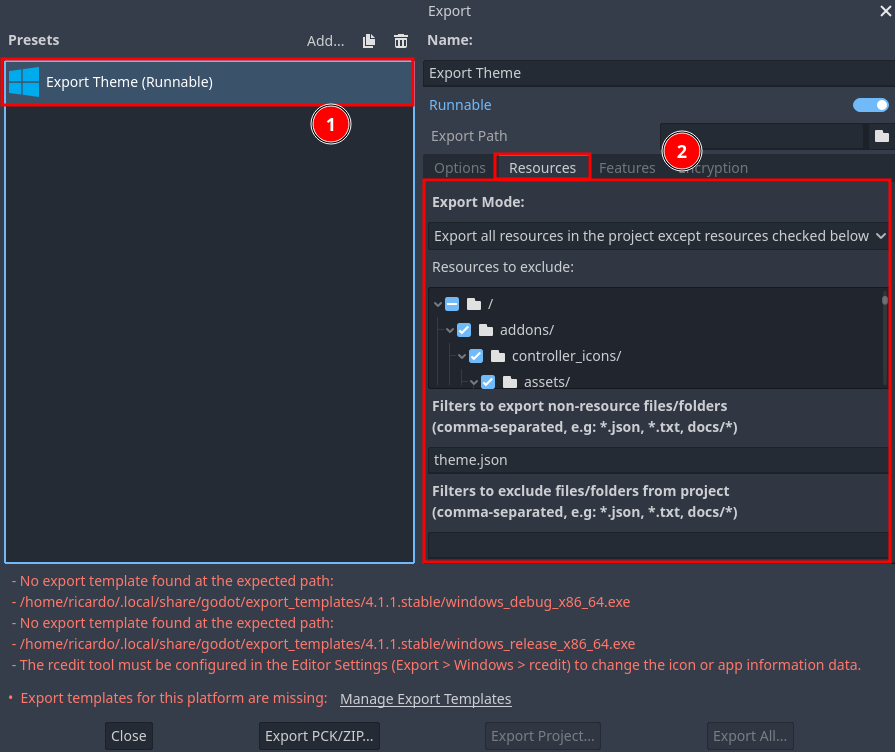
Finally, you can export your theme by clicking at Export PCK/Zip….
Note
You need to export in the PCK format, as it’s the only one RetroHub currently supports.
Testing
To test your theme, drop the exported theme in RetroHub’s theme folder, and open it in the app.
Conclusion
Congratulations on creating your first theme! To make this tutorial short and to the point, the final theme ended up being pretty barebones, but it was enough to demonstrate that all the implementation details are up to you as a theme developer, and that you’ll have a lot of freedom on how to create themes.
For more in-depth guidance, check the remaining help pages, and for any questions, suggestions, or just showcasing your work, join us at Discord and Reddit.